On this page
Somewhere around your third self-hosted service, the same question shows up for everyone: where do all the files actually go? Your Plex library is growing, Immich wants a home for ten years of photos, and stuffing everything onto the boot drive of one container feels — correctly — like a mistake waiting to happen. The answer the entire homelab world converges on is a NAS. This post explains what that actually means, walks through the three forms a NAS can take, and helps you pick the one that fits your budget and your appetite for tinkering.
What a NAS actually is
NAS stands for network-attached storage: a device whose whole job is to hold files and serve them to every other machine in your house over the network. That’s the entire trick. Instead of your movies living on the media server, your photos on a laptop, and your backups on a USB drive in a drawer, everything lives in one place that every device — TVs, phones, laptops, and your Proxmox cluster — can reach.
Under the hood, a NAS is just a computer with a lot of disk space running file-sharing protocols. The two you’ll meet constantly are SMB (the one Windows speaks natively — Macs and Linux speak it too) and NFS (the Unix-native option, and usually the better choice between Linux machines). We cover setting both up in Shared Storage for Your Homelab.
The important mental shift: a NAS is a role, not necessarily a product. A $600 Synology box is a NAS. A ten-year-old PC running TrueNAS is a NAS. A Samba share in an LXC container on the Proxmox host you already own is also a NAS. Which form is right for you is the real question.
The three forms a NAS can take
1. The commercial box: Synology, QNAP, UGREEN, Asustor
This is the appliance route: a small plastic-or-metal enclosure with two to six drive bays, a low-power CPU, and a polished web interface that holds your hand through everything — RAID setup, shared folders, phone photo backup, even running Docker containers on the higher-end models. Synology’s DSM is the reference point for how good this software can be; competitors have spent a decade chasing it.
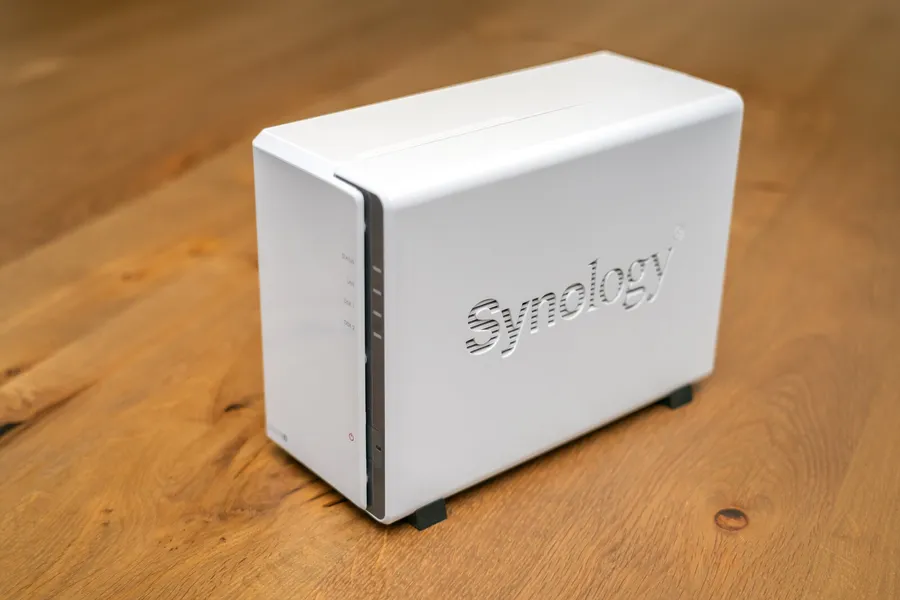

Choose this when: the data matters more than the hobby. If the NAS is holding the only copies of family photos and you want it working — reliably, with alerts and updates handled — by Sunday dinner, the premium is worth it. The trade-offs are real, though: you pay two to three times the raw hardware cost, the CPUs are usually anemic, and you’re inside one vendor’s ecosystem for as long as the box lives.
2. The DIY build: TrueNAS or Unraid on your own hardware
Take any PC with room for a few drives — an old desktop tower is genuinely ideal — and install a purpose-built storage OS. TrueNAS is the free, open-source heavyweight built on ZFS, the filesystem that checksums every block of your data and heals silent corruption on the fly (we dig into why that matters in the Proxmox storage guide). Unraid is its commercial cousin, beloved for letting you mix mismatched drive sizes.
Choose this when: you want maximum storage per dollar and you’ve got the appetite to learn. A used tower plus two 8 TB drives costs less than an empty two-bay Synology, and ZFS is honestly the better filesystem. The trade-off is that you are the support department — though if you’re reading this site, that may be a feature.
3. The share on hardware you already own
Here’s the option the buying guides skip, and the one most readers of this site should actually start with: your Proxmox host is already an always-on computer. Add a dedicated data drive, spin up a lightweight LXC container, and serve Samba and NFS from there — the complete walkthrough is in Shared Storage for Your Homelab. Total cost: one hard drive.
Choose this when: you’re starting out, the budget went to the mini PCs, and your data is measured in hundreds of gigabytes rather than tens of terabytes. You lose the separation between storage and compute — if the host is down, so are your files — but you can graduate to either of the other options later and simply move the drives.
Whatever form you pick, understand what RAID does and doesn’t do. RAID keeps the NAS running when a drive fails. It does nothing about accidental deletion, ransomware, a lightning strike, or theft — whatever happens to the array happens to every “copy” in it. Follow the 3-2-1 rule: three copies of anything you can’t lose, on two different kinds of media, one of them off-site. Our Proxmox Backup Server guide covers the on-site half.
How to actually choose
Skip the spec sheets for a moment and answer three questions.
How much data, honestly? Add up what you have, then double it — media libraries only grow. Under ~2 TB: the share-on-Proxmox route is fine. Two to 20 TB: any of the three works; the decision is about time and money. Beyond that you’re building a DIY box, because commercial bays get expensive fast.
What happens if it dies on a Tuesday? If the answer is “mild annoyance,” optimize for cost. If the answer involves irreplaceable photos, optimize for boring reliability: mirrored drives, a vendor (or an OS) that emails you when a disk starts failing, and a tested backup. On drive choice, ignore the marketing tiers and read Backblaze’s published failure statistics — real annualized failure rates from hundreds of thousands of drives beat any “Pro” label.
Who maintains it? A commercial box asks an hour a month. TrueNAS asks a weekend up front and occasional care after. The LXC share asks nothing you aren’t already doing to run Proxmox. Be honest about which future version of you shows up for maintenance.
The quiet good news: this decision is reversible. Drives move between enclosures, files copy across the network, and the protocols — SMB and NFS — are identical in all three worlds. Most people who stay in this hobby own two or three of these forms over the years. Start with the one that fits today.
Related posts
- Shared Storage for Your Homelab: Samba and NFS Done Right — build the LXC-share version, step by step
- Proxmox Storage Guide: local-lvm, ZFS, NFS — the filesystems underneath all of this
- Proxmox Backup Server — the backup half of the 3-2-1 rule
- Install Plex on a NAS or Proxmox LXC — the most common thing a homelab NAS feeds
- Install Jellyfin on a NAS or Proxmox LXC — same, for the free-software route
- Self-Host Your Photos with Immich — why your phone backup deserves NAS storage
- Choosing Homelab Hardware — where a NAS fits in the bigger shopping list
Recommended hardware
Recommended hardware for this setup:
- Synology DS224+ 2-bay NAS — the “it just works” starting point with the best software in the appliance world
- UGREEN NASync DXP2800 — newer challenger with much stronger hardware per dollar
- WD Red Plus 8TB NAS drive — CMR NAS-rated drive for any of the three builds
- Seagate IronWolf 8TB — the other safe default; check Backblaze’s stats and buy whichever is cheaper
Sources: Microsoft — SMB file sharing overview, TrueNAS documentation, Synology DSM, Backblaze Drive Stats.
This post contains Amazon affiliate links (tag: buildahomelab-20). I earn a small commission on qualifying purchases at no extra cost to you.
Comments
Comments are powered by GitHub Discussions — sign in with a GitHub account to join the conversation.